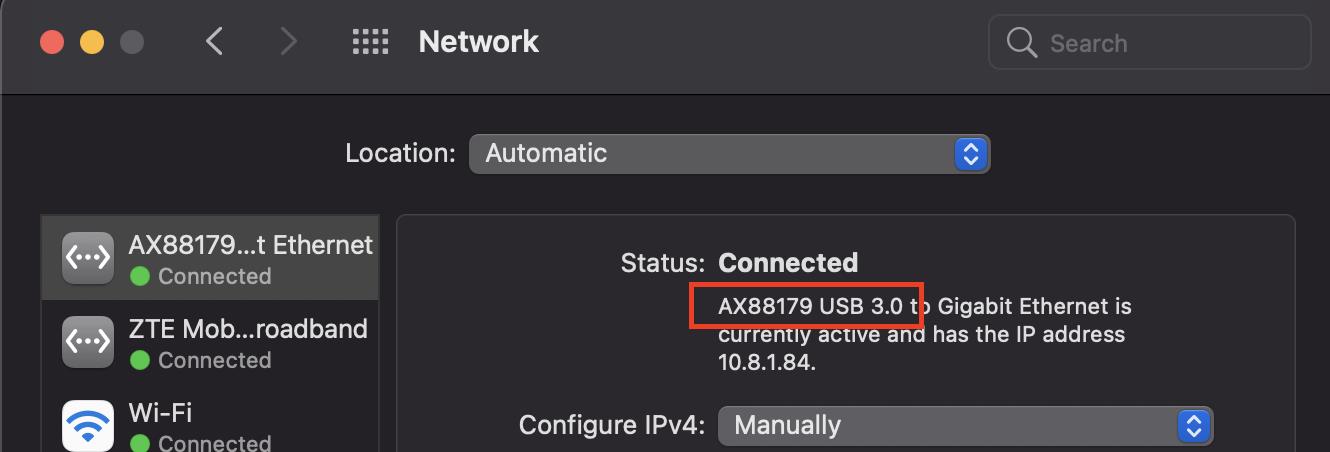
升級前沒確認網卡會不會有問題,以為跟往常一樣,升級後頂多重裝就會生效,
結果悲劇,連 j5create 英文官網也說目前尚未支援 Big Sur 冏rz,
只好 google 大神…
先聲明:筆者目前只提供 bata 版,因工作需要,先解決不能用的問題,不急的可等到正式版發佈再安裝
確認版本:以下為簡單判斷網卡晶片是否為 AX88179

AX88179 原廠晶片驅動下載 (筆者目前下載為 AX88179_178A_macOS_10.9_to_11_Driver_Installer_v2.19.0_beta2 ,未來可能會有更新的版本):
操作步驟 (以下為網友提供的操作方式,筆者試過可行,只是原提供者SIP後來沒開啟,所以有多做SIP重啟):
英文原版:
1- Unplug your USB-Ethernet device.
2- Get the latest version and discard all advices about using older versions. Get version 2.19 (beta2) which is currently available. Do NOT install driver now !
3- Uninstall old driver first using the uninstaller that comes with the latest driver. You will have to restart.
4- Wait your screen to be off due to Restart, then directly... (next point)
5- Keep holding Command+R wile your PC is booting. Keep holding until the Apple logo appears. (If you fail to enter recovery mode, shut down and repeat this point).
6- Select your account and enter password.
7- Choose Utilities > Terminal.
8- csrutil disable
9- /usr/sbin/spctl kext-consent list
10- If 5RHFAZ9D4P is not in the list, enter: /usr/sbin/spctl kext-consent add 5RHFAZ9D4P . Otherwise, skip this point.
11- Restart you mac.
12- This is the critical point which you might miss from all other instructions available: Remove Allow permission you provided earlier to asix team (5RHFAZ9D4P). This is important to let your OS accept the device again. Follow these steps carefully:
sudo su
(enter your password if prompted), then...
sqlite3 /var/db/SystemPolicyConfiguration/KextPolicy
delete from kextloadhistoryv3 where teamid='5RHFAZ9D4P';
delete from kextpolicy where teamid='5RHFAZ9D4P';
.quit
13- Install driver.
14- Now you will be prompt to Allow this driver in System Preferences -> Security & Privacy.
15- Connect your USB-Ethernet device.
16- Your USB-Ethernet device should work by now. Ensure you have ethernet connected to router/Switch to verify.
17- If it does not yet work, try running this in terminal: sudo kextload -b com.asix.driver.ax88179-178a
中文操作版:
1- 拔掉 USB 實體網卡
2- 請先下載最新的驅動程式 ( 目前是2.19 beta2 ),但不要先安裝,不要先安裝,不要先安裝,很重要
3- 移除舊的驅動程式,移除的方式從舊驅動 dmg 檔裡,執行 xxxxx.Uninstall.command,之後重新啟動 macOS
4- 等到變成黑畫面的時候,馬上持續「按住」command+R 不要放開,直到蘋果系統進入 recovery 模式
6- 選擇原本登入Mac的帳號,並輸入密碼
7- 選擇 Utilities > Terminal. ( 筆者語系預設英文,應該不會有中文介面吧?!XD 有的話應該是 應用工具 > 終端機 )
8- 輸入 csrutil disable ( 會關閉SIP保護,之後安裝完成可再開啟 )
9- 輸入 /usr/sbin/spctl kext-consent list
10- 看一下清單是否有 5RHFAZ9D4P 這個項目, 如果有則略過,如果沒則輸入 /usr/sbin/spctl kext-consent add 5RHFAZ9D4P
11- 重新啟動 macOS ( 不需要再按 command+R )
12- 進 macOS 後,開啟 Terminal,輸入
sudo su
(輸入密碼後...)
sqlite3 /var/db/SystemPolicyConfiguration/KextPolicy
delete from kextloadhistoryv3 where teamid='5RHFAZ9D4P';
delete from kextpolicy where teamid='5RHFAZ9D4P';
.quit
13- 安裝新的驅動程式
14- 可能會出現安裝性需求授權,在 System Preferences -> Security & Privacy. 按接受
15- 連接你的實體網卡,理論上應該是可以運作,並且能上網 ( 如果無法運作,則嘗試執行第16步,如果可以,則執行第18步 )
16- 如果不能正常運作的話,開啟 Terminal 輸入 sudo kextload -b com.asix.driver.ax88179-178a
17- 輸入完16步後,有可能需要重啟 macOS 才能生效
18- 重啟 macOS 並在黑畫面的時候,按住 command+R 進入 recovery 模式
19- 選擇 Utilities > Terminal.
20- 輸入 csrutil enable (開啟 SIP 保護)
21- 重新啟動 macOS
參考來源:


0 留言